how to connect v0moda boom mic to dst770 pro For audiophiles and content creators, achieving top-notch sound quality is crucial. Whether you’re a podcaster, gamer, or musician, selecting the right gear can dramatically elevate your audio experience. Among the premier options are the DT770 Pro headphones paired with the V-Moda Boom Mic. This combination provides both crystal-clear sound and outstanding voice clarity.
In this guide, we’ll explore the steps to connect the V-Moda Boom Mic to the DT770 Pro headphones. We’ll offer practical tips, address common issues, and ensure you achieve a fully optimized audio setup for recording, streaming, and communication. Plus, as a fun bonus, we’ll include a Wordle hint today—perfect for those moments when you need a mental break from the tech talk!
Essential Equipment for how to connect v0moda boom mic to dst770 pro
Before starting the connection process, it’s important to ensure you have all the required equipment. While the DT770 Pro headphones from Beyerdynamic are renowned for their exceptional sound quality, they don’t include a built-in microphone, which is where the V-Moda Boom Mic becomes essential. Here’s what you’ll need to get everything set up properly:
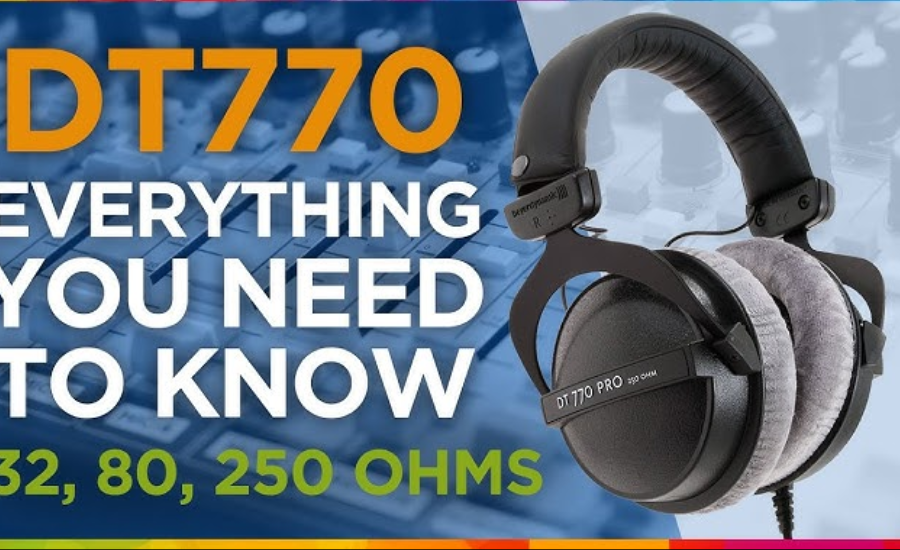
- DT770 Pro Headphones: These studio-quality headphones from Beyerdynamic are celebrated for their superior sound isolation and precise audio reproduction.
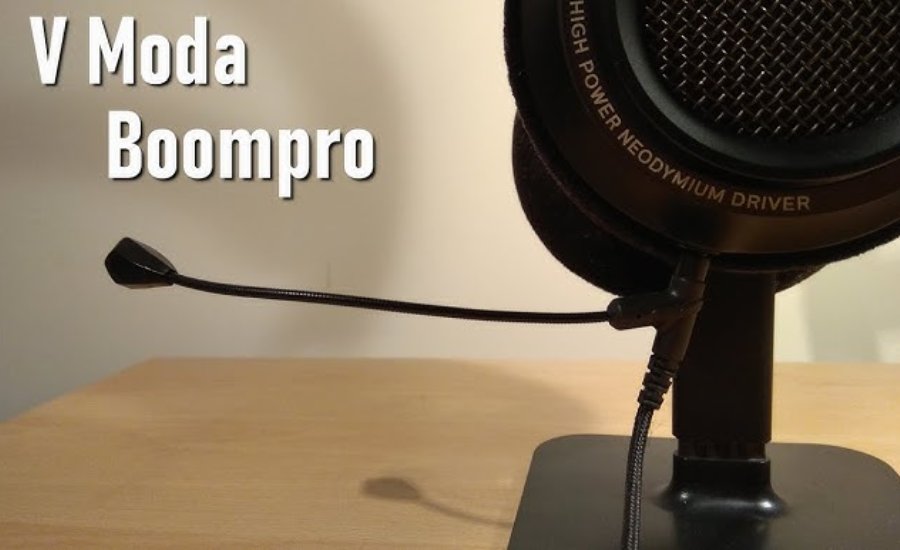
- V-Moda Boom Pro Microphone: This detachable boom microphone connects through a 3.5mm jack and provides clear, high-quality voice capture.
- Y-Splitter Cable (Optional): Depending on your specific setup, a Y-splitter might be necessary to separate the audio output from the microphone input.
- PC, Console, or Audio Interface: This is the device you will connect your headphones and microphone to, such as a computer, gaming console, or external audio interface.
With these components in hand, you’re ready to proceed with connecting and optimizing your audio setup.
Step-by-Step Instructions for Connecting the V-Moda Boom Mic to DT770 Pro
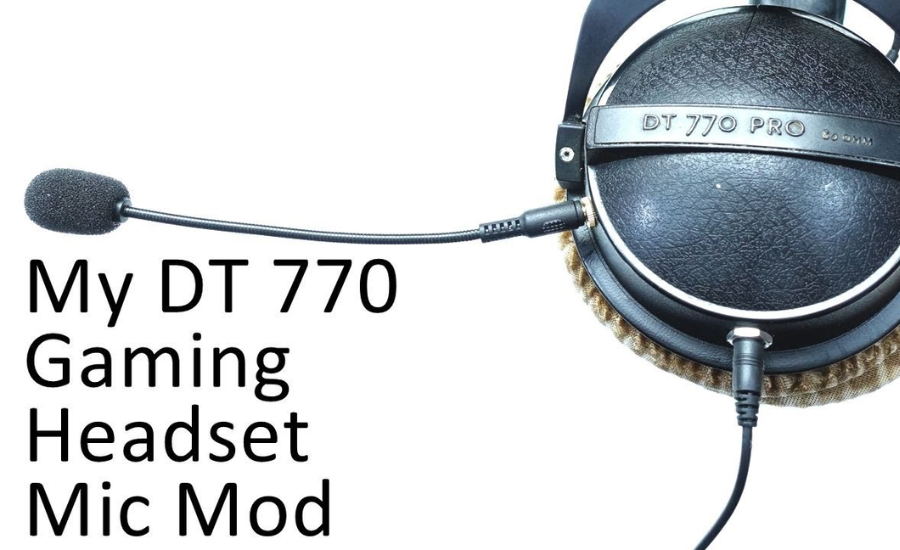
Step 1: Remove the Existing Cable from the DT770 Pro
To start, you need to detach the original cable from your DT770 Pro headphones. The DT770 Pro usually comes with a fixed, non-detachable coiled cable, which can be a bit inconvenient. You have two options:
- If You’ve Modified Your Headphones: If your DT770 Pro has been upgraded with a detachable cable mod, simply disconnect the existing cable from the headphones.
- If You Haven’t Modified Your Headphones: Use an adapter designed to connect the V-Moda Boom Mic without removing the stock cable. These adapters are available online and are a good choice for those who prefer not to permanently alter their headphones.
Step 2: Connect the V-Moda Boom Mic
With the stock cable removed, you can now connect the V-Moda Boom Mic:
- Plug the Boom Mic: Insert the 3.5mm connector of the V-Moda Boom Mic into the headphone jack of the DT770 Pro. If you are using an adapter or a Y-splitter, ensure these are connected first before plugging them into your audio device.
- Check the Connection: Ensure that the connection is firm and secure to avoid any audio issues.
Step 3: Connect to Your PC, Console, or Audio Interface
Next, integrate your setup with your chosen device:
- On a PC: Plug the 3.5mm jack into the headphone/microphone port. If your PC has separate ports for audio and mic, use a Y-splitter to connect both components.
- On a Gaming Console: Consoles like PlayStation or Xbox may need specific adapters to connect both the headphones and microphone. Check your console’s requirements and use the appropriate adapters.
- With an Audio Interface: For those using an audio interface, connect the headphones and mic to the interface’s designated inputs. Verify that your interface supports both audio and microphone connections.
Step 4: Configure Your Audio Settings
Once everything is connected, you’ll need to adjust your audio settings for optimal performance:
- On Windows: Go to Control Panel > Sound > Recording, and select the V-Moda Boom Mic as your default recording device. You can also adjust the mic volume and boost levels here.
- On Mac: Navigate to System Preferences > Sound > Input, and choose the V-Moda Boom Mic as your input device. Adjust the microphone levels as needed.
- On Consoles: Console audio settings can vary, so locate the audio settings menu and ensure the boom mic is selected as the active microphone.
Step 5: Test Your Setup
Finally, test your equipment to ensure everything is working correctly:
- Headphone Test: Play some audio through your headphones to check for clear sound and appropriate volume levels.
- Microphone Test: Record a test voice memo or use a communication app like Discord or Skype to check that the microphone captures your voice clearly without distortion or unwanted background noise.
By following these steps, you’ll be able to effectively connect and configure your V-Moda Boom Mic with DT770 Pro headphones, ensuring a high-quality audio experience.
Resolving Common Issues When Connecting the V-Moda Boom Mic to DT770 Pro
Even with careful setup, you might encounter some issues when connecting the V-Moda Boom Mic to your DT770 Pro headphones. Here are some common problems and how to address them:
1. No Sound from the Microphone
If your microphone isn’t capturing any sound, consider these troubleshooting steps:
- Check the Connection: Ensure the 3.5mm jack is securely connected to both the headphones and your device. A loose connection can prevent the mic from working properly.
- Verify Audio Settings: Make sure the V-Moda Boom Mic is set as your default input device in your system’s audio settings. Incorrect settings can lead to no sound being detected.
- Inspect the Cable: If the mic still isn’t working, the cable might be damaged. Try using a different 3.5mm cable or Y-splitter to see if the issue resolves.
2. Distorted or Low-Quality Audio
If you’re experiencing distorted or poor-quality audio from the microphone, try the following solutions:
- Adjust Microphone Boost: Access your audio settings and experiment with the microphone boost levels. Increasing or decreasing the boost can improve audio clarity.
- Minimize Background Noise: High levels of background noise can affect audio quality. Consider using a noise gate or adjusting the microphone’s sensitivity to reduce unwanted sounds.
3. Headphones Not Producing Sound
If your DT770 Pro headphones aren’t producing sound after connecting the V-Moda Boom Mic:
- Recheck Connections: Confirm that the 3.5mm jack is properly plugged into the correct port and that there are no issues with the cable.
- Test with Another Device: Plug the headphones into a different device to determine if the problem lies with the headphones or your initial setup.
By following these troubleshooting tips, you can resolve common issues and ensure your V-Moda Boom Mic and DT770 Pro headphones function properly.
Benefits of Pairing the V-Moda Boom Mic with DT770 Pro
You might be curious about the appeal of combining the V-Moda Boom Mic with the DT770 Pro headphones. Here’s why this pairing is highly regarded:
- Exceptional Audio Quality: The DT770 Pro headphones are celebrated for their well-balanced sound profile, offering rich bass, clear mid-range frequencies, and crisp high notes. When paired with the V-Moda Boom Mic, you gain the advantage of clear, professional-grade communication, making it an excellent choice for gaming, podcasting, or video calls.
- Comfort for Extended Use: The DT770 Pro is designed with comfort in mind, featuring plush ear cushions and a robust build. This makes them perfect for long gaming sessions or extended recording periods, especially when complemented by the V-Moda Boom Mic.
- Flexibility: The V-Moda Boom Mic is detachable, giving you the flexibility to switch between professional audio tasks and casual use. When you don’t need the mic, simply remove it and enjoy the DT770 Pro’s high-quality audio performance on its own.
Taking a Break with Wordle
Amid all the tech talk, sometimes it’s refreshing to take a break and enjoy something lighthearted. Enter Wordle—the popular daily word puzzle that’s both entertaining and mentally stimulating. If you need a mental diversion, why not solve today’s Wordle puzzle?
Here’s a hint for today’s puzzle: Think of a word that describes your sound setup when it’s working flawlessly—something that conveys clarity, efficiency, and perfection. Can you guess the word?
Exploring the OneKey Pro Wakker Dashboard
The dashboard serves as the central hub of the OneKey Pro Wakker experience, offering a streamlined interface for managing your data, adjusting settings, and performing essential tasks like file encryption and password generation. Designed with user-friendliness in mind, the dashboard features well-organized sections that make it accessible and straightforward, even for those new to the software.
Key Features of OneKey Pro Wakker
OneKey Pro Wakker distinguishes itself with a comprehensive suite of features. It excels in password management and file encryption, providing robust protection for your sensitive information. Its compatibility across various platforms ensures seamless integration whether you’re using a desktop, smartphone, or tablet. The built-in password generator creates strong, secure passwords to further enhance your online security.
Setting Up Your OneKey Pro Wakker Account
To begin using OneKey Pro Wakker, start by creating an account. After downloading the software, you will be prompted to set up a master password. This password is crucial as it grants access to all your encrypted data. Choose a master password that is both secure and memorable, balancing complexity with ease of recall.
Navigating the User Interface
The OneKey Pro Wakker interface is designed for simplicity and efficiency. Upon logging in, you will encounter a dashboard that facilitates easy access to features such as password management, file encryption, and digital asset storage. The interface is intuitively organized, with clearly marked sections for each function, making it accessible for users of all experience levels.
Managing Digital Assets with OneKey Pro Wakker
In addition to its robust features for file encryption and password management, OneKey Pro Wakker offers secure storage and management for digital assets, such as cryptocurrencies. By seamlessly integrating with your digital wallets, the software ensures that your crypto holdings remain safeguarded. This functionality allows you to efficiently manage and monitor your assets, minimizing the risk of cyberattacks and data breaches.
Getting Started with OneKey Pro Wakker
To begin using OneKey Pro Wakker, first download and install the software on your device. After installation, you’ll need to create a master password, which is crucial for accessing your encrypted data. Choose a master password that is both strong and memorable, incorporating a mix of letters, numbers, and symbols to enhance security.
Password Management
One of the standout features of OneKey Pro Wakker is its secure password management capability. You can either manually enter your passwords or import them from other password management tools. The software enables you to categorize and organize your passwords, making them easily accessible while only requiring you to remember your master password.
File Encryption
OneKey Pro Wakker also provides powerful file encryption options. You can upload personal or business documents into the software, which will then encrypt them using advanced algorithms. This ensures that your files are protected from unauthorized access, offering a high level of security for sensitive information.
Final Words
Combining the Beyerdynamic DT770 Pro headphones with the V-Moda Boom Mic delivers an exceptional audio setup for any audiophile or content creator. This pairing offers superior sound quality and clear communication, whether you’re recording, streaming, or engaging in gaming sessions. With the steps outlined in this guide, you can ensure a seamless connection and troubleshooting process, maximizing the performance of your audio gear.
On another note, managing your digital security is just as crucial as your audio setup. OneKey Pro Wakker provides a comprehensive solution for password management and file encryption, ensuring that your sensitive information remains secure. Its user-friendly interface and robust features make it an essential tool for safeguarding your digital life.
By investing in high-quality audio equipment and reliable security software, you can enhance both your creative projects and your overall digital safety. Stay tuned for more tips and tricks, and don’t forget to take a break with a fun puzzle like Wordle to keep your mind sharp and refreshed.
Whether you’re perfecting your sound setup or securing your data, the right tools make all the difference.
Stay in the loop for upcoming updates and alerts! Twinkle Crest