In photography, lighting is one of the most critical elements, and utilizing flash effectively can transform your images, especially in challenging lighting conditions. For Minolta XGA camera users, maximizing the potential of your camera’s flash can greatly improve your photo quality. This guide will walk you through how to use the flash on your Minolta XGA with detailed instructions, expert tips, and practical techniques. Whether you’re capturing moments in low light or adding a creative flair to your shots, mastering flash photography will significantly enhance your overall results. By understanding how to control and optimize your flash, you’ll be able to capture sharper, more vibrant images, regardless of the lighting conditions.
Exploring The Minolta XGA: A Fusion Of Classic Design And Modern Technology
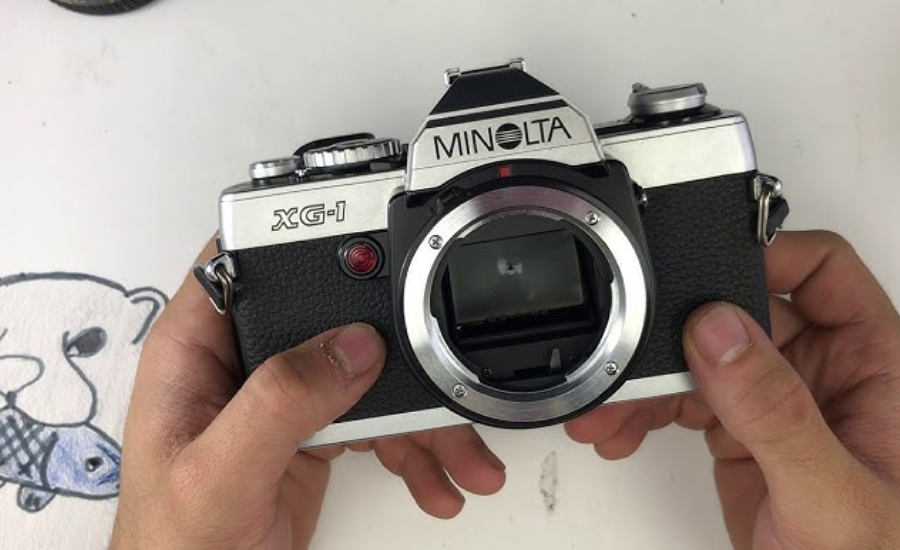
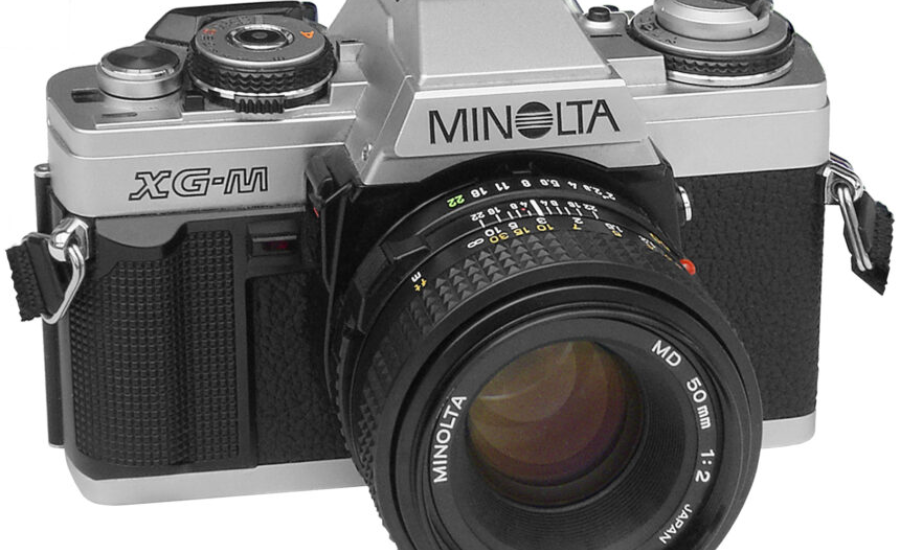
The Minolta XGA is a standout camera that effortlessly combines a timeless aesthetic with innovative features. Introduced in the late 20th century, it quickly built a reputation among photography enthusiasts for its versatility and user-friendly design. This camera offers advanced functionality for its era, giving photographers the tools they need to experiment with various techniques while capturing high-quality images.
One of the key advantages of the Minolta XGA is its compact, portable structure, making it a suitable option for both amateur photographers and professionals. Whether you’re shooting in casual settings or working on more serious projects, the XGA provides a reliable platform to hone your skills.
A particularly impressive feature of the Minolta XGA is its compatibility with a variety of flash options. This adaptability allows photographers to be more creative when shooting in different lighting environments, ensuring they can capture the perfect shot even in challenging conditions. To truly unlock the potential of this camera, it’s essential to become familiar with its extensive range of settings and flash modes. By mastering these options, you can significantly enhance the quality of your photography, creating stunning images that reflect your artistic vision.
Common Flash Issues With The Minolta XGA And How To sue flash in minolta xga
While the Minolta XGA offers strong flash capabilities, flash photography can sometimes present challenges that affect the overall quality of your images. Here are some common flash-related issues and tips on how to sue flash in minolta xga :
- Exposure Problems: One of the most frequent flash-related issues is improper exposure. This happens when the flash output is either too strong or too weak relative to the subject’s distance or the ambient light in the environment. As a result, photos can turn out either overexposed, with washed-out details, or underexposed, where parts of the image appear too dark. To fix this, it’s important to adjust the flash intensity and experiment with exposure compensation settings to match the lighting conditions. Understanding how to manually control these settings can help you achieve a balanced exposure in your shots.
- Slow Sync Speed Challenges: In low-light conditions, using the slow sync flash setting can sometimes lead to motion blur. This is especially true if the camera’s shutter speed is too slow to capture fast-moving subjects clearly. To prevent blurred images, it’s crucial to practice proper hand-holding techniques or use a tripod for stabilization. Additionally, adjusting the shutter speed and combining it with the appropriate flash setting can help you maintain sharpness while still capturing the ambient light in the background.
- Flash Misfire Issues: Occasionally, the flash unit may fail to fire when you need it, which can be frustrating. This misfire is often caused by simple issues like low battery power or improper connections between the flash and the camera’s hot shoe. Ensure your batteries are fully charged and the flash unit is properly seated in the hot shoe to avoid these mishaps. Regular maintenance and checking the flash connections before shooting can prevent unexpected failures.
- Dealing with Red-Eye: Red-eye is a common problem in portrait photography, particularly when using the built-in flash. This occurs when the flash reflects off the subject’s retinas, resulting in an unnatural red glow in their eyes. Thankfully, red-eye can be reduced or eliminated through a few adjustments. Activating the red-eye reduction feature on your camera, using external flash units positioned at an angle, or bouncing the flash off a surface like a wall or ceiling can all help minimize this issue, ensuring more natural and flattering portraits.
By understanding and addressing these common flash issues, you can improve your results when using the Minolta XGA, allowing you to take full advantage of its capabilities and capture beautifully lit images in any situation.
Types Of Flash You Can Use with the Minolta XGA
When it comes to achieving the best lighting for your photography, using the right type of flash can make all the difference. The Minolta XGA offers several flash options to cater to various lighting needs, whether you’re shooting casual photos or more advanced, professional setups. Below, we explore the different types of flash you can use with the Minolta XGA and how to maximize their potential.
1. Built-in Flash
The Minolta XGA’s built-in flash is a practical choice for everyday photography, providing a quick and easy way to add light to your shots. Though it is compact and convenient, understanding how to optimize its use can greatly improve the quality of your images.
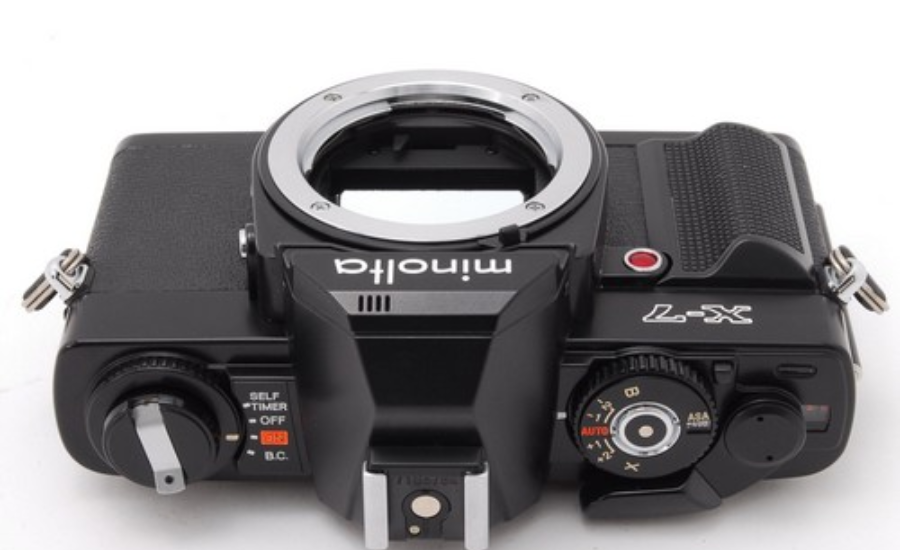
- Pop-up Flash Mechanism: To activate the built-in flash, simply press the flash pop-up button located near the flash unit. Once it pops up, the camera is ready to use the flash in your chosen mode.
- Flash Operating Modes: The built-in flash offers a variety of modes that can be tailored to different lighting conditions. For instance, the Auto mode automatically adjusts the flash intensity based on the scene, while Red-eye reduction mode helps minimize red-eye in portraits. You can also use Fill-flash to add light to shadows in bright outdoor settings, balancing exposure.
- Flash Synchronization: The built-in flash on the Minolta XGA automatically syncs with the camera’s shutter speed, ensuring that the light fires at the correct time for optimal exposure. This synchronization is particularly useful in environments with unpredictable lighting.
2. External Flash
For those seeking more control and versatility in their lighting setup, an external flash is an excellent investment. External flashes offer a range of benefits that allow for more creative and professional results.
- Increased Power: External flashes typically provide more power compared to the built-in option, making them ideal for shooting in low-light conditions or when additional lighting is required for large scenes. Their higher intensity can better illuminate your subject and reduce the chances of underexposure.
- Flexible Positioning: One of the main advantages of an external flash is the ability to position it away from the camera. By detaching the flash from the camera body, you can avoid the harsh shadows often caused by direct flash, resulting in more natural-looking photos. Off-camera flash positioning also opens up creative possibilities like side-lighting or backlighting, which can dramatically alter the mood of your shots.
- Advanced Features: Many external flashes come equipped with advanced settings that enhance lighting control. Features such as bounce flash allow you to reflect light off ceilings or walls to diffuse it, creating softer illumination. Diffusion settings can spread the light evenly across the scene, while adjustable flash intensity lets you fine-tune the amount of light based on your shooting needs.
How to Use an External Flash with the Minolta XGA:
- Attaching the Flash: To use an external flash with your Minolta XGA, first attach the flash unit to the hot shoe on top of the camera. Slide the flash into place and ensure it clicks securely.
- Configuring Flash Settings: After attaching the flash, navigate to the camera’s settings menu and activate the external flash option. Choose the appropriate flash mode that aligns with your shooting environment—whether you’re aiming for fill light, bounce flash, or a more direct approach.
- Adjusting Flash Compensation: External flashes offer more flexibility in adjusting brightness. You can fine-tune the flash compensation setting to either increase or decrease the flash output depending on the ambient light. This is especially useful when trying to achieve a specific exposure or mood for your photograph.
By understanding and leveraging both built-in and external flash options, you can significantly improve the quality of your photos with the Minolta XGA. Each type of flash brings its own advantages, allowing you to adapt to a variety of lighting situations and bring out the best in your subjects.
Popular Flash Photography Techniques
Now that you’ve learned how to sue flash in minolta xga , let’s explore a few common flash photography techniques that can elevate your photography to the next level.
1. Fill Flash
Fill flash is especially helpful in bright outdoor settings, where shadows can create uneven lighting on your subject. Here’s how you can make the most of fill flash:
- Activate the flash in daylight: Even in sunny conditions, using a flash can help fill in harsh shadows and provide a more even exposure across your subject.
- Soften the light: Rather than using direct flash, try bouncing the light (if possible) or using a diffuser to soften the illumination for a more natural effect.
2. Slow Sync Flash
Slow sync flash is ideal for situations where you want to capture both the subject and background in low-light environments, such as nighttime scenes:
- Set your camera to Slow Sync mode: This mode allows your camera to use a longer exposure time, enabling more ambient light to enter the shot while the flash focuses on lighting the subject.
- Combine foreground and background details: The result is a well-lit subject against a properly exposed background, perfect for night or indoor photography.
3. Rear-Curtain Sync
This technique is great for photographing movement, as it triggers the flash at the end of the exposure rather than the beginning, creating a more natural blur of motion:
- Set your flash to Rear-Curtain Sync mode: The flash fires at the end of the exposure, allowing motion trails to form behind moving subjects, resulting in a dynamic and creative effect.
- Use for action shots: Rear-curtain sync is particularly useful for capturing motion, like cars in motion or people dancing, creating a striking sense of movement in your images.
Solving Common Flash Photography Issues
Even seasoned photographers can experience challenges when working with flash. Below are a few frequent issues and tips for troubleshooting them:
1. Flash Not Firing
- Check the battery: Ensure your flash has sufficient power by confirming that the battery is fully charged.
- Connection problems: Ensure that the flash is securely attached to the camera’s hot shoe. If necessary, remove the flash and reconnect it.
- Camera settings: Double-check your camera’s settings to confirm that the flash is enabled.
2. Overexposed Photos
- Adjust flash compensation: If your images are overexposed, reduce the flash power by adjusting the flash compensation settings on your camera.
- Maintain a proper distance: Make sure you’re not standing too close to your subject when firing the flash, as proximity can cause overexposure.
3. Harsh Shadows
- Use a diffuser: To soften the shadows, try diffusing the flash with a specialized diffuser or bounce the light off a nearby surface, such as a ceiling or wall.
- Reposition the flash: For external flashes, try adjusting the angle and direction of the flash away from your subject to achieve softer, more flattering shadows.
Tips and Techniques for Capturing the Ideal Shot
In flash photography, lighting is everything. Experiment with various angles and distances to see how to sue flash in minolta xga it transforms your images. Moving closer to your subject can help create a more intense, dramatic effect.
Timing is Key
When capturing dynamic scenes, being able to anticipate the right moment is essential. Whether you’re photographing fast-moving subjects or fleeting moments, perfect timing can dramatically enhance the quality of your shots.
Take Advantage of Manual Controls
Don’t hesitate to use the manual settings on your Minolta XGA. These settings allow you to adjust exposure and shutter speed, giving you complete creative control over your shots. Manual adjustments can open up more opportunities for artistic expression.
Combine Flash with Natural Light
Incorporating ambient light into your shots is an effective way to add depth and dimension. Combining natural light with flash can give your images a balanced, well-lit look without being too harsh or overly flat.
Practice and Refine Your Technique
As with any photography skill, practice is essential. Try shooting in different conditions and environments to get a feel for how your camera performs. Each photo you take helps you improve and brings you closer to mastering your technique.
FAQs
1. How do I create a dramatic effect in flash photography with the Minolta XGA?
Experimenting with distance and angle is key. Moving closer to your subject while using the flash can create a more intense and dramatic effect in your photos.
2. Should I use manual settings on my Minolta XGA for flash photography?
Yes! Using manual settings gives you full control over exposure and shutter speed, allowing for more creative freedom and precision when capturing your shots.
3. Can I combine natural light with flash in my photos?
Absolutely. Combining ambient light with flash can help balance your lighting, making your photos look less harsh and more naturally illuminated.
4. How important is timing when capturing dynamic scenes?
Timing is crucial when photographing moving subjects. Anticipating the right moment can make a significant difference in the quality and impact of your image.
5. How can I improve my flash photography skills with the Minolta XGA?
The best way to improve is through practice. Take multiple shots in different lighting conditions and environments to learn how your camera responds, and refine your technique over time.
Conclusion
Mastering flash photography with the Minolta XGA requires both patience and experimentation. By understanding how lighting, timing, and manual settings interact, you can capture striking and professional-quality photos. Whether it’s blending natural light with flash or perfecting your timing for dynamic scenes, each click of the shutter offers an opportunity to refine your skills. Remember, practice is your greatest tool, so continue exploring and testing new techniques to enhance your photographic journey.
Stay connected for the latest news and exciting stories on Twinkle Crest!