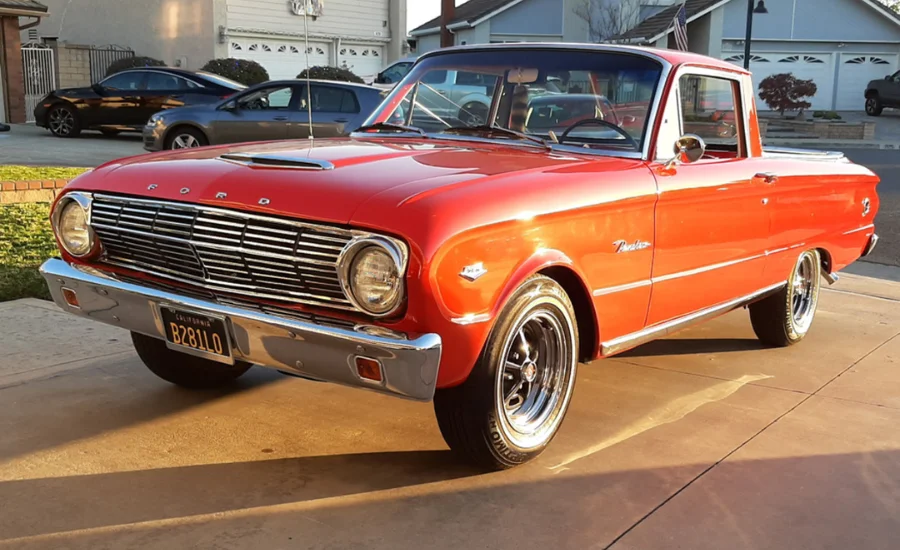
Interior Door Sill Trim 74 Ranchero Replacement Essential Guide to Replacing the Interior Door An important part of a 1974 Ford Ranchero’s inside door sill trim is its visual appeal and overall usability. This trim is located at the bottom of the door frame and covers the area where the door and car body meet. It adds to the vehicle’s vintage appeal while shielding the region from harm. Over time, constant use, exposure to the elements, and natural wear and tear on the door sill trim make replacement necessary to maintain both its appearance and functionality.
Although it may appear difficult at first, replacing the door sill trim on a 1974 Ranchero may be made much easier with the correct equipment and knowledge of the procedure. This tutorial offers a thorough explanation of the replacement process to assist you in repairing your Ranchero door.
Essential Guide to Replacing Interior Door Sill Trim on a 1974 Ford Ranchero

A Interior Door Sill Trim 74 Ranchero Replacement Essential Guide to Replacing the Interior Door 1974 Ford Ranchero’s inside door sill trim is essential to the vehicle’s usefulness and beauty. This trim, which is positioned at the bottom of the door opening, protects the door sill from wear and tear as well as common harm like scuffs and scratches. The door sill trim is an important component that adds to the vehicle’s elegance and authenticity, as well as serving as a protective element for enthusiasts of vintage cars such as those who operate on 1974 Ranchero cars. To keep the car looking its best and retain its classic beauty, this trim needs to be maintained or replaced.
Enhancing Your 1974 Ford Ranchero The Importance of Replacing Interior Door Sill Trim
Every Interior Door Sill Trim 74 Ranchero Replacement Essential Guide to Replacing the Interior Door little detail counts when restoring a car, and replacing the interior door sill trim on a 1974 Ford Ranchero is one such instance. This trim serves a dual purpose in terms of appearance and utility. Practically speaking, it protects the internal edges from dirt, moisture, and wear and tear. It improves the interior’s overall aesthetics, making the car appear more put together and well-maintained.
The interior door sill trim has to be replaced if you see any cracks, discolouration, or other wear indicators. This component is subject to environmental factors and frequent foot traffic, which might cause it to deteriorate with time. Updating this component keeps your Ranchero functional and valuable while also restoring its aesthetic appeal.
Understanding the Role of Door Sill Trim in Classic Cars
Door sill trim, which is placed around the edge of an automobile’s door opening, is an important component of vehicle design. Its main function is to shield the door frame from regular wear and tear, scuffs, and scratches caused by passengers entering and exiting the car. Usually made of durable materials like rubber, plastic, or metal, this trim improves the vehicle’s appearance in addition to offering useful protection.
Interior Door Sill Trim 74 Ranchero Replacement Essential Guide to Replacing the Interior Door trim of vintage cars, like the 1974 Ford Ranchero, frequently has unique patterns and finishes that capture the essence of the time. It is imperative to either maintain or repair the trim when it exhibits indications of wear or damage because this ornamental element has a considerable impact on the overall appearance of the interior.
Finding the Right Replacement for Your 1974 Ranchero’s Interior Door Sill Trim
One of the most important parts of rebuilding a 1974 Ford Ranchero is choosing the right new interior door sill trim. It can be difficult to find the correct replacement part because of the vehicle’s antique status. As there were multiple trim options available for the 1974 Ranchero, start by determining the style and material of the original trim.
Originally Interior Door Sill Trim 74 Ranchero Replacement Essential Guide to Replacing the Interior Door intended to blend in with the interior decor of the car, the door sill trims were usually composed of either premium plastic or metal. Either locate an OEM (Original Equipment Manufacturer) item or a fine replica that closely resembles the original design and finish for an authentic replacement. If you want to keep your Ranchero functional and authentic, you must make sure the replacement trim fits these requirements.
Addressing Issues with Your 1974 Ranchero’s Door Sill Trim
Your 1974 Ford Ranchero’s door sill trim may develop fading, scratches, and other problems with time. If left unattended, these issues not only make the car less visually appealing but also increase the risk of future damage. When it comes to historic automobiles, keeping the original trim or a high-quality replacement is essential to maintaining the vehicle’s authenticity and worth.
Explicit physical damage, peeling or discoloration, and a poor fit that reduces the trim’s functionality are indicators that your door sill trim may need to be replaced. Interior Door Sill Trim 74 Ranchero Replacement Essential Guide to Replacing the Interior Door Timely replacement of the trim ensures that your Ranchero remains both visually attractive and fully functional. Addressing these issues promptly helps maintain the classic charm and integrity of your vehicle.
Finding Replacement Interior Door Sill Trim for the 1974 Ranchero
When looking for a replacement interior door sill trim for your 1974 Ford Ranchero, you have several options. Classic car restoration shops and online marketplaces that specialize in vintage car parts are excellent resources. Many websites dedicated to automotive enthusiasts feature sections for Ranchero components, where you can find the precise trim you need.Furthermore, some manufacturers sell replacement parts that are made to precisely match your Ranchero’s original specifications.
Make sure the new trim is appropriate with your particular model and year to guarantee a correct fit and preserve the vehicle’s original appearance. Before making a purchase, carefully read the specifications and product descriptions because some sellers might offer parts that match different years or models of vehicles. You may produce a smooth appearance and prevent installation problems by using this meticulous choosing method.
Overview of the 1974 Ford Ranchero Door Sill Trim
When Interior Door Sill Trim 74 Ranchero Replacement Essential Guide to Replacing the Interior Door looking for a replacement interior door sill trim for your 1974 Ford Ranchero, you have several options. Classic car restoration shops and online marketplaces that specialize in vintage car parts are excellent resources. Many websites dedicated to automotive enthusiasts feature sections for Ranchero components, where you can find the precise trim you need.Furthermore, some manufacturers sell replacement parts that are made to precisely match your Ranchero’s original specifications.
Make sure the new trim is appropriate with your particular model and year to guarantee a correct fit and preserve the vehicle’s original appearance. Before making a purchase, carefully read the specifications and product descriptions because some sellers might offer parts that match different years or models of vehicles. You may produce a smooth appearance and prevent installation problems by using this meticulous choosing method.
Preparing for the Replacement of the 1974 Ranchero Door Sill Trim
Obtaining Interior Door Sill Trim 74 Ranchero Replacement Essential Guide to Replacing the Interior Door the replacement door sill trim for your 1974 Ranchero is the first step; the next is to assemble the parts and tools needed for a seamless installation. Efficiency and accuracy are ensured by having the proper equipment, even though the operation is rather simple.
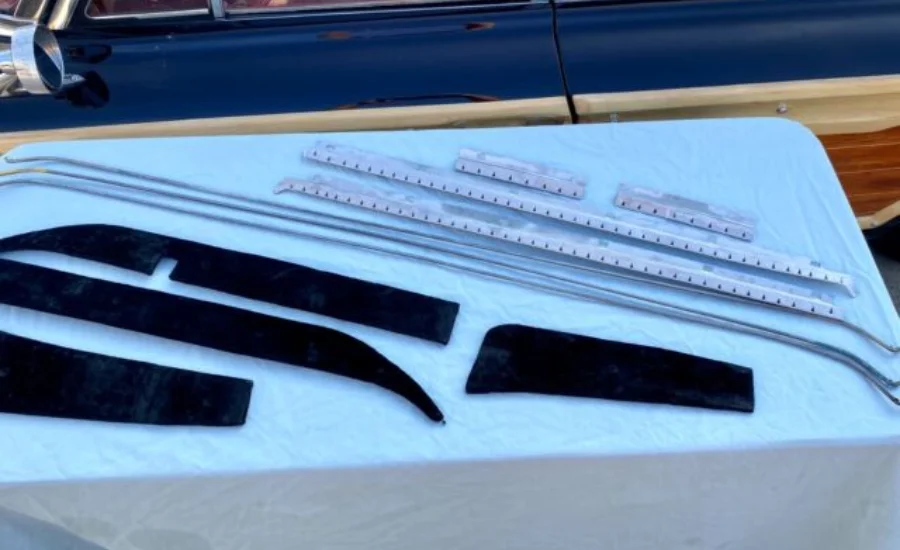
You’ll need a few basic tools to get started. A set of screwdrivers is essential for both inserting and removing screws. A rubber mallet can help secure the new trim into place, and a pry tool can help carefully remove the old trim without causing harm. Adhesive can be required depending on the installation specifications, so make sure to buy new screws or clips separately to ensure a secure fit if your replacement trim does not come with them.
It’s crucial to prep the area where the new trim will be fitted before starting the installation. Thoroughly clean the surface to get rid of any residue or debris. This process helps guarantee that the new trim fits and adheres correctly, improving your Ranchero’s overall look and functionality.
Interior Door Sill Trim 74 Ranchero Replacement Sill Trim for a 1974 Rancheroa
Selecting the appropriate replacement door sill trim for your 1974 Ford Ranchero involves careful consideration of several key factors to ensure you achieve both compatibility and quality.
Start by looking at the various material alternatives, which include rubber, metal, and plastic. Every substance has unique benefits and disadvantages. For example, metal trimmings are a popular option for preserving the vehicle’s original appearance because of their classic design and reputation for durability. Conversely, plastic trimmings may be less expensive than their metal equivalents, but they might not last as long. Another alternative is rubber trimmings, which offer flexibility and wear resistance but may not be as visually appealing.
Compatibility is equally important. Verify that the replacement trim is specifically designed for the 1974 Ranchero to ensure a perfect fit. Using trim that does not match the original specifications can result in installation challenges and may compromise both the appearance and functionality of the trim. By selecting a part that aligns with the vehicle’s design, you maintain both its aesthetic integrity and protective function.
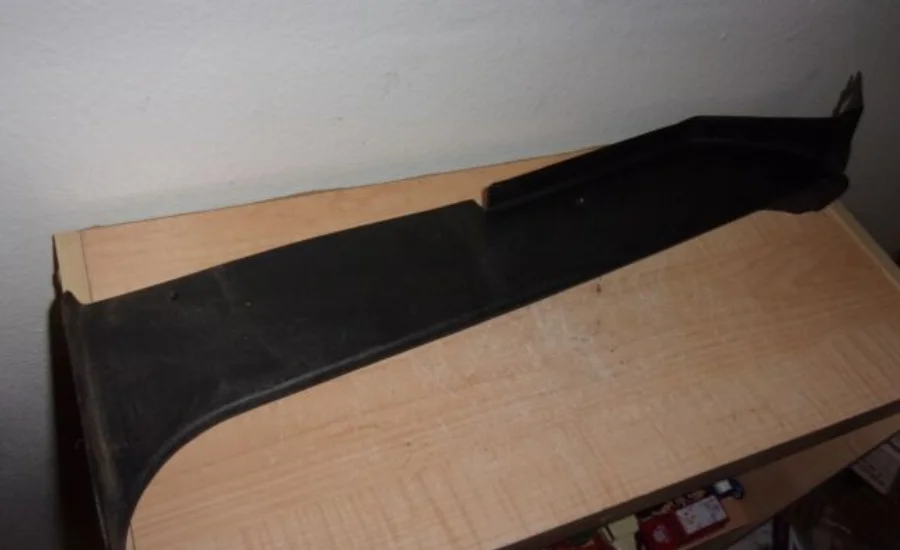
Removing Old Interior Door Sill Trim on a 1974 Ranchero
The initial phase of replacing the interior door sill trim on a 1974 Ford Ranchero involves carefully removing the old trim. This process requires precision to avoid damaging surrounding parts of the vehicle.
First, find and remove any visible fasteners, such as screws or clips, holding the trim in place. After removing these bolts, carefully push the old trim off the door sill using a pry tool. If the trim is securely affixed owing to age or glue, use a moderate amount of pressure when applying the pry tool. Working slowly and carefully is crucial to avoid scratching the paint or harming the interior.
Look Interior Door Sill Trim 74 Ranchero Replacement Essential Guide to Replacing the Interior Door for any evidence of rust, dust, or damage in the area after the old trim has been removed.
Address any issues you find, as this will help ensure that the new trim adheres properly and has a longer lifespan. Thoroughly cleaning the surface before installing the new trim will provide a secure fit and contribute to a more durable result.
OEM vs. Aftermarket Parts How to Decide What’s Best for Your Vehicle
Original Equipment Manufacturer (OEM) parts and aftermarket substitutes are your two major options when choosing replacement parts for your car.
The original equipment manufacturer of the car produces OEM parts, guaranteeing excellent quality and a precise fit. Their design adheres precisely to the original components’ specifications, which can be crucial for preserving the vehicle’s worth and performance. On the other hand, OEM components, particularly for older models, may be more expensive and more difficult to find.
Third-party-produced aftermarket parts frequently offer a larger assortment and sometimes even lower pricing. A lot of well-made aftermarket parts can provide quality that is on par with OEM parts. Still, in order to be sure the parts fit and last up to your requirements, choose those made by reliable manufacturers.
Installing New Interior Door Sill Trim for a 1974 Rancheroa
When it comes to selecting replacement components for your car, your two main options are OEM (original equipment manufacturer) parts and aftermarket alternatives.
OEM components are made by the vehicle’s original equipment manufacturer, which ensures superior quality and a precise fit.
Their design adheres precisely to the original components’ specifications, which can be crucial for preserving the vehicle’s worth and performance. On the other hand, OEM components, particularly for older models, may be more expensive and more difficult to find.
Third-party-produced aftermarket parts frequently offer a larger assortment and sometimes even lower pricing. A lot of well-made aftermarket parts can provide quality that is on par with OEM parts. Still, in order to be sure the parts fit and last up to your requirements, choose those made by reliable manufacturers.
Preparing for the Replacement of Interior Door Sill Trim on a 1974 Ranchero
It is essential to assemble all required tools and materials before beginning the 1974 Ranchero inside door sill trim replacement. A screwdriver, trim removal tools, adhesive remover, and the new door sill trim itself are necessary items for this procedure. Additionally, prepare cleaning items like a microfiber cloth and an inside surface cleanser for your car.
Having these supplies and tools on available will guarantee a polished finish and make the replacement procedure go more smoothly. Steer clear of utilizing homemade equipment that could harm the interior of your car. For optimal results, always follow the installation guidelines provided by the manufacturer.
Overcoming Challenges in Replacing the Interior Door Sill Trim on a 1974 Rancheroa
On a 1974 Ranchero, replacing the interior door sill trim can be difficult, especially if the new trim does not fit precisely the first time. Misalignment is a frequent problem where the trim may sit unevenly or have holes in it. Should this issue arise, take care to take off the trim and realign it before reattaching it.
If there is any rust or corrosion on the door sill, it could be more difficult to install the new trim because of this. Before starting the installation, take care of any rust problems by sanding the area and using a rust inhibitor. This will guarantee a more seamless installation procedure and aid in preventing additional harm.
You might have to drill the holes yourself if the replacement trim does not have pre-drilled holes. To prevent misalignment problems, take exact measurements to make sure the new holes line up with the original screw placements.
Enhancing Your 1974 Ranchero’s Interior Restorationa
One of the most important parts of renovating your 1974 Ranchero’s interior is replacing the interior door sill trim, but there are many other components that also play a part in how your vintage car looks and feels. Think about taking care of the dashboard, carpeting, and seats, among other interior elements, to accomplish a full repair.
To achieve a clean and coherent design, make sure the new door sill trim matches the other restored interior elements. Whether you drive your Ranchero on a daily basis or show it off at vintage vehicle events, this attention to detail improves not just its visual appeal but also its market worth.
Steps for Effective Replacement of Your 1974 Ranchero’s Door Sill Trima
Successful replacement of the door sill trim on your 1974 Ranchero begins with meticulous preparation. Begin by carefully removing the old trim. Utilize specialist trim removal instruments to prevent harming the adjacent region. If there is adhesive involved, carefully pull off the trim and use an adhesive remover to get rid of any adhesive residue that may remain.
Make sure the space where the new trim will be put is completely clean after removing the old trim. This stage is essential to guarantee the new trim is attached securely and to keep dirt and debris from getting in the way of the installation. After using a microfiber cloth and an appropriate cleanser, make sure the surface is thoroughly dry before proceeding to the following step.
Installing Your New Door Sill Trim A Step-by-Step Guide

Once the preparation is complete, you’re ready to install the new door sill trim on your 1974 Ranchero. Begin by carefully positioning the new trim along the door frame. Ensure that it aligns properly with any existing mounting points or clips.
If the installation requires adhesive, apply it according to the manufacturer’s instructions. Firmly press the trim into place to ensure a secure fit and to avoid any gaps. For trims that use clips or fasteners, verify that they are correctly engaged and that the trim is stable.
After installation, inspect the trim from different angles to ensure a smooth and professional finish. This thorough check will help confirm that the trim is both securely attached and visually aligned with the rest of your vehicle’s interior.
Maintaining Your New Interior Door Sill Trim Essential Tips
Maintaining your 1974 Ranchero properly after installing the new door sill trim is essential to keeping it in excellent condition and extending its life. The accumulation of dust and filth can be avoided by routine cleaning using a gentle cleanser and a soft cloth. Steer clear of strong chemicals as they may harm the trim’s finish.
Preventing rust and damage also requires keeping the trim dry and clear of moisture, particularly if you are in an area with high humidity or a lot of rain. Check the trim on a regular basis for any problems, like loose screws or finish chips. Resolving these issues as soon as possible can help preserve the integrity and aesthetic appeal of your newly installed door sill trim.
Troubleshooting Common Issues with Door Sill Trim Replacement
A common challenge when replacing door sill trim is ensuring a proper fit. Misalignment or sizing issues can occur if the replacement trim does not match the specifications of your vehicle. To avoid this problem, verify the compatibility of the trim with your vehicle before starting the installation.
If you find that the trim does not fit correctly during installation, carefully remove it and reassess the alignment and fit. Sometimes, minor adjustments may be necessary to achieve a perfect fit. Review the installation instructions thoroughly and, if needed, consult a professional to ensure the trim is installed correctly and securely.
Finding Quality Replacement Interior Door Sill Trim for Your 1974 Ranchero
For a 1974 Ranchero, you need to get high-quality new interior door sill trim. You should only buy from reliable vendors who specialize in restoring vintage cars. Many internet vendors and markets target enthusiasts who own vintage cars and provide a large selection of parts for cars such as the 1974 Ranchero.
To make sure you’re buying a high-quality goods, do some research on the seller and check customer reviews before making a purchase. Selecting a dependable replacement component will reduce the frequency of repairs, which will save you money and time.
Apart from that, taking part in vintage automobile events and exhibits can be a great opportunity to meet other Ranchero owners and find reliable suppliers of replacement parts. Making connections with other aficionados can yield insightful information.
Ensuring Proper Adhesive Application for Interior Door Sill Trim
Applying adhesive correctly is essential to properly attaching new door sill trim. In the event that the trim isn’t sticking as it should, you should first look for any extra adhesive or residue from a prior trim. Before reapplying the adhesive, thoroughly clean the area to get rid of any pollutants.
Make sure the glue is applied uniformly and in compliance with the manufacturer’s guidelines. It’s critical to give the adhesive enough drying time to completely cure. If the adhesion problems persist, you may need to take off the trim, try a different glue, or consult a specialist for assistance.
Final Words
On a 1974 Ford Ranchero, replacing the interior door sill trim is not just necessary for aesthetic reasons but also for maintaining the vehicle’s overall integrity and value. The interior appearance of your Ranchero can be significantly improved while maintaining its long-lasting durability by choosing the appropriate replacement item and following the right installation procedures.
Restoring a classic vehicle like the Ranchero demands meticulous attention to detail and a commitment to high-quality craftsmanship. Every component, from the door sill trim to the engine parts, plays a vital role in the success of your restoration project. By investing in premium replacement parts and maintaining them properly, you can enjoy your Ranchero for years to come, whether driving it or displaying it at classic car events.
Ultimately, the key to a successful interior door sill trim replacement lies in sourcing the right parts, taking care during installation, and performing regular maintenance to keep the trim in excellent condition.
For More Information Check This Twinkle Crest