A roof replacement is a significant project for any homeowner, requiring careful planning and an understanding of the steps involved. A well-executed roof replacement protects your home from weather damage and enhances its overall appearance and value. By knowing what to expect throughout the replacement process, homeowners can better prepare for each phase, from initial planning and material selection to installation and final inspection. We will explore the roof replacement process in detail at Summit Home Solutions LLC near Saco, offering insights to help you navigate each step smoothly and confidently. This results in a roof that meets your needs and stands the test of time.
Steps of the roof replacement process
- Initial Assessment and Planning
The roof replacement process begins with thoroughly assessing your current roof’s condition. A roofing contractor will typically inspect the existing roof to determine the extent of wear and damage, identifying any underlying structural issues that may need attention. This assessment helps in creating a plan for the replacement, including the selection of appropriate materials and the estimation of costs. Homeowners should also discuss their preferences regarding roofing materials, colors, and styles. Once an assessment is complete, the contractor will provide a timeline and estimated budget, allowing homeowners to plan accordingly. With a clear plan, the replacement process can move forward with minimal surprises.
- Preparing the Property for Replacement
Once the planning stage is complete, preparing the property for roof replacement is essential. This preparation typically involves moving outdoor furniture, covering landscaping, and protecting any delicate plants or fixtures around the house. Roofing contractors often set up tarps around the home’s perimeter to catch debris and protect the exterior and landscaping from damage. Additionally, it’s wise for homeowners to remove or secure items in the attic, as vibrations from the replacement process can cause items to shift. Preparing the property thoroughly reduces the risk of accidental damage and makes cleanup easier once the job is finished, ensuring a smoother experience for everyone involved.
- Removal of the Old Roof
The next step in the roof replacement process is removing the old roofing materials. Contractors will carefully strip away the existing shingles, underlayment, and other components down to the roof decking. This phase can be noisy and messy, but inspecting and preparing the surface for the new roof installation is crucial. During this phase, the contractor will examine the roof decking for any signs of rot, water damage, or structural weakness that may need to be addressed. If repairs to the decking are necessary, they will be completed before installing the new roofing materials begins. Removing the old roof allows for a fresh start, ensuring the new roof is installed on a sound and stable base.
- Installing the Underlayment and Flashing
After removing the old roof and making necessary repairs to the decking, the next step involves installing the underlayment and flashing. The underlayment is a protective barrier, preventing moisture from seeping through the roof decking. Usually made of felt or synthetic options, this material is rolled out across the entire surface, creating an additional defense against water damage. Typically made from metal, flashing is installed around areas prone to leaks, such as chimneys, skylights, and valleys. Flashing helps direct water away from these vulnerable spots, reducing the risk of leaks in the future. Proper installation of underlayment and flashing is essential to the new roof’s long-term durability and water resistance.
- Laying the New Shingles or Roofing Material
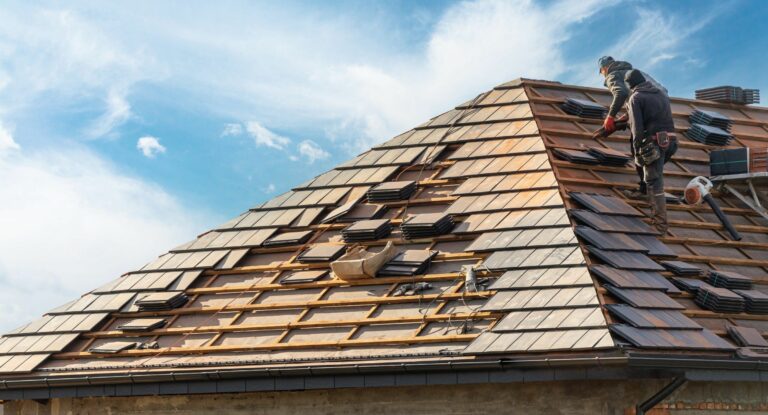
Once the underlayment and flashing are in place, it’s time to lay down the new roofing material. Shingles are the most common material, (tile roof installation is a popular choice for those seeking a durable and aesthetically pleasing option), or slate, depending on their preferences and budget. During this phase, contractors carefully align and secure each shingle or panel, ensuring the roof has a uniform appearance and solid coverage. This part of the process typically takes several days, depending on the size and complexity of the roof. The contractors will use specific techniques to ensure each layer is correctly overlapped, providing a tight seal that withstands wind and rain. This step transforms the home’s look, giving it a refreshed appearance and a strong new layer of protection.
- Final Inspection and Cleanup
The final step in the roof replacement process involves a thorough inspection and cleanup. Contractors will inspect the entire roof to ensure that each component has been installed correctly and meets industry standards for safety and durability. This inspection includes checking the shingles, underlayment, flashing, and any venting systems installed during the replacement. Once the roof passes inspection, the contractor will begin the cleanup process, removing any remaining debris, nails, and protective tarps. Many roofing companies use magnetic tools to collect stray nails around the property, ensuring safety for residents and pets. The final inspection and cleanup mark the end of the project, leaving the homeowner with a pristine new roof and a tidy property.
A roof replacement is a multi-step process that requires careful planning, skilled installation, and thorough final checks. We will explore how each phase, from the initial assessment and property preparation to the final inspection, plays a crucial role in ensuring a durable, attractive roof that adds value to your home. By understanding what to expect at each stage, homeowners can confidently approach the roof replacement process, knowing their home will be well-protected for years to come. With the right guidance and a professional team, a roof replacement becomes a valuable investment in your home’s safety and beauty.


